Tuesday, May 23, 2017

iOS 静态库/动态库/ Framework


静态库

静态库即静态链接库,Windows 下的 .lib,Linux 和 Mac 下的 .a。
静态库的代码在编译过程中就被载入目标程序,因此目标程序的体积会比较大。
iOS静态库形式:.a和.framework(我们自己建立的)。

动态库

动态库即动态链接库,Windows 下的 .dll,Linux 下的 .so,Mac 下的 .dylib/.tbd。
动态库编译时只是引用,是在程序运行时候才加载的,因此不影响目标程序的体积。
iOS动态库形式:.dylib和.framework(属于系统的)。

iOS Framework
framework实际上是一种打包方式,将库的二进制文件,头文件和有关资源文件打包一起。
在iOS8之前,iOS平台不支持使用动态Framework; iOS8/Xcode 6推出后,才添加了动态库的支持,同时Xcode6也原生自带了Framework支持(动态和静态都可以)。

 CocoaPods支持
纯ObjC里,多数都是使用静态库.a来集成。建立private repo,  提供podspec配置


如果想集成Framework,podspec使用s.vendored_frameworks配置


对于 Swift 项目,CocoaPods 提供了动态 Framework 的支持,在podfile里要使用use_frameworks!


参考资讯


Monday, May 8, 2017

编译directx-jun2010的Effects11工程引发的问题

Microsoft DirectX SDK (June 2010)简称directx-jun2010
在编译directx-jun2010\Samples\C++\Effects11\Effects11_2013.sln工程出错:


找不到directx-jun2010自己相关的头文件,查了一下工程的配置属性,发现VC++目录里使用到环境变量DXSDK_DIR,
由于在构建环境里,directx-jun2010是在其它环境安装后直接拿数据来用的,这就导致了DXSDK_DIR是不存在的。


我是使用nant脚本编译工程的,试着在编译前增加DXSDK_DIR的环境变量,但这对VC来说是不生效的


查询了devenv语法(https://msdn.microsoft.com/zh-cn/library/ms241275.aspx),发现它有一个开关/useenv, 作用是将环境变量加载到“VC++ 目录”对话框中。我尝试着将vccompile改为vccompile_useenv。


结果出现另一个错误


需要调用vsvars32.bat重新初始化VC的环境变量

exec不在同一个进程里,vsvars32.bat的调用无效。
最后,尝试重新设置INCLUDE,LIB环境变量以便工程编译中能找到相关的依赖文件,以下是编译脚本


Thursday, March 2, 2017

iOS应用上传AppStore出现Invalid Swift Support

【问题】
Invalid Swift Support - The bundle contains an invalid implementation of Swift. The app may have been built or signed with non-compliant or pre-release tools. Visit developer.apple.com for more information.
【解决】使用xcodebuild来编译,将丢失SwiftSupport目录。
解决的方式是:创建SwiftSupport,将swift lib库拷一份,注入Ipa包。

# Invalid Swift Support-- miss SwiftSupport
xcodepath=`xcode-select --print-path`
ipa_swift_frameworks=`find ${CONFIGURATION_BUILD_DIR}/${BUILD_PROEJCT_NAME}.app/Frameworks/ -name libswift*`
if [[ -n ${ipa_swift_frameworks} ]]; then 
    tmpDir=${CONFIGURATION_BUILD_DIR}/SwiftSupport
    [[ -d "$tmpDir" ]] || mkdir $tmpDir

    for LINE in ${ipa_swift_frameworks}
    do
      libname=`basename $LINE`
      cp "${xcodepath}/Toolchains/XcodeDefault.xctoolchain/usr/lib/swift/${sdk}/${libname}" $tmpDir
    done

    pushd ${CONFIGURATION_BUILD_DIR} && zip -r $WORKSPACE/artifacts/${MOBILE_APP_NAME}.ipa SwiftSupport
    popd
fi

参考资料:


使用codesign重签名ipa包

重新签名步骤

解压
unzip ysl.ipa

移除旧签名
rm -r "Payload/ysl.app/_CodeSignature" 2> /dev/null | true

替换 provisioning profile
cp "$MOBILEPROVISION" "Payload/ysl.app/embedded.mobileprovision"

entitlements生成
/usr/libexec/PlistBuddy -x -c "print :Entitlements " /dev/stdin <<< $(security cms -D -i "$MOBILEPROVISION") > "entitlements.plist"

重新签名
/usr/bin/codesign -f -s "iPhone Distribution: xxx” "--entitlements "entitlements.plist" "Payload/ysl.app"
例如:/usr/bin/codesign -f -s 8F16D32B97E8564C20613BC00699E547B265D62C --entitlements entitlements.plist Payload/ysl.app

验证签名
spctl -a -v Payload/ysl.app
/usr/bin/codesign --verify --deep --verbose=3 Payload/ysl.app

重新打包
zip -qr "ysl.resigned.ipa" Payload


重签名问题

【问题】 ERROR ITMS-90166: "Missing Code Signing Entitlements. No entitlements found in bundle 'com.ysl' for executable ‘Payload/ysl.app/ysl'.""
【解决】签名需要的Entitlements信息可以通过两个地方获取,一个是编译后生成在build/Distribute-iphone/objects/ysl.build/Distribute-iphoneos/ysl.build/ysl.app.xcent
另一种是通过从profile里获取,即/usr/libexec/PlistBuddy -x -c "print :Entitlements " /dev/stdin <<< $(security cms -D -i ~/ProvisioningProfiles/AppStore_com.ysl.mobileprovision) > entitlements.plist

【问题】ERROR ITMS-90179: "Invalid Code Signing. The executable ‘Payload/ysl.app/ysl' must be signed with the certificate that is contained in the provisioning profile."
【解决】发现是重签名指定的证书与 provisioning profile不匹配,重新分配。

[问题iPhone Distribution: xxxxx.: ambiguous (matches "iPhone Distribution: xxxxx" and "iPhone Distribution: xxxxx" in /Users/elian/Library/Keychains/ci.keychain)
按照官方提供的方案是需要删除重复的证书。但由于我们的环境是需要多证书的。故使用另一种方式解决,即获取证书的sha1值,在指定--sign时,后面跟上签名证书的sha1.例如:/usr/bin/codesign -f -s 8F16D32B97E8564C20613BC00699E547B265D62C 

如何获取sha1配置:
security find-identity -p codesigning login.keychain
8G16D32B97E8564C20613BC00699E547B265D26C "iPhone Distribution: Company11 name
003981HH13D6226942D43525E6045A23525A85AC "iPhone Distribution: Company22 name"
158DD26AD3B200CF12FE79C66CA9830C52D7813D"iPhone Distribution: Company33 name"

case “$signTeamName" in 
  *11*)
    signIdentity=9G16D32B97E8564C20613BC00699E547B265D35u
    ;;
  *22*)
    signIdentity=003981HH13D6226942D43525E6045A23525A85TD
    ;;
  *33*)
    signIdentity=868DD26AD3B200CF12FE79C66CA890C52D7890I
    ;;      
esac


Jenkins集成iOS单元测试

xctest是xcode5自带的,另外对block的支持,mock的支持都还好。 之前叫做OCUnit
【准备】
jenkins接收junit的单元测试报告,因些需要安装一个将ocunit格式的测试报告转为JUnit.
OCUnit2JUnit项目地址: https://github.com/ciryon/OCUnit2JUnit
安装方式:sudo gem install ocunit2junit
--问题: ocunit2junit在 ruby 1.8.7的环境不能运行,我试着升级ruby到2.0.0安装OK。

【运行】
1. 你可以单独准备单元测试的schemes,比如名为proTests.  或着build工程的schemes里含有单元测试的target。
2. 在build环节中增加:xcodebuild -sdk iphonesimulator7.0 -destination OS=7.0,name="iPhone Retina (4-inch)" -scheme proTests -configuration Release test  2>&1 | ocunit2junit
-- 问题:在xcdoe 5.0环境下运行,如果未加-destination,刚会报错:

3. 输出报告:默认报告输出目录test-reports
【报告】
jenkins集成报告:点击“Add post-build action”选择“Publish JUnit test result report”,输入内容test-reports/*.xml保存设置
效果图如下:


参考资料:
https://developer.apple.com/library/ios/technotes/tn2339/_index.htmlD


创建于14年10月28


Tuesday, February 21, 2017

客户端项目发布build设计

方案一:在取代码之前创建TAG

缺陷:Jenkins的SVN插件会根据触发时间去计算该获取的修订号,新创建TAG不在此时间范围内,会取不到。

方案二:发布build前创建TAG并调用另一个任务取该TAG的代码

缺陷:发布build前会先取代码,此时默认获取trunk的代码或者选中的其它开发线,该发布build的SVN修订号会默认该trunk或其它开发线的值,而不是另一个任务取完TAG的SVN修订号。
取巧:
1. 创建一个空的TAG,以便不需要获取trunk的代码或者选中其它开发线,以便节省构建时间。
2. 获取TAG代码的任务,在取完TAG之后创建属性文件记录SVN修订存储在WORKSPACE工作区。其中,要确保发布build任务与取TAG代码的任务保持在同一个WORKSPACE。


jenkins设计 

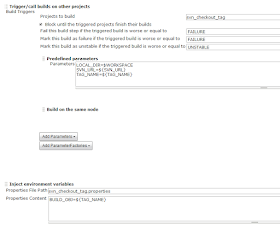
第二步:Configure release build
发布build相关参数设置

检测发布tag与发布对象是否一致

创建一个发布tag

获取发布tag并记录SVN_REVISION

创建于20140626


Monday, February 20, 2017

HG使用笔记

准备

取代码
hg clone --insecure https://172.18.100.116/sdk/iPhone iPhone

更新代码

FAQ
【问题】window下操作hg命令报错:abort: error: _ssl.c:504: error:14090086:SSL routines:SSL3_GET_SERVER_CERTIFICAT
E:certificate verify failed
【解决】编辑%USERPROFILE%\mercurial
[auth]
bj.prefix=https://1.2.3.4/hgrepo
bj.username=yusulian
bj.password=xxxxxx
[hostfingerprints]
1.2.3.4=ce:xx:xx:xx:xx:xx:xx:xx:xx:xx:xx:xx:xx:xx:xx:xx:xx

[ui]
username =yusulian

【问题】waiting for lock on working directory of /data/_BUILD/mobilebuild/sdk/sdk-android_test held by 'ub-1204-64-ci:10065'
【解决】sudo rm .hg/wlock 


iOS应用进行企业分发,在iOS7.1安装失败--“无法安装应用程序,xxx.com的证书无效”

iOS 7.1修改了manifest.plist文件的访问协议,之前可以通过http协议访问,在iOS 7.1之后必须使用https协议方式访问。

如果原来plist的链接地址如下:

itms-services://?action=download-manifest&url=http://yourdomain.com/manifest.plist
则现要改为是https,如下:
itms-services://?action=download-manifest&url=https://yourdomain.com/manifest.plist

Wednesday, February 15, 2017

Android Sonar

【介绍】
Android lint : Android代码优化工具
http://tools.android.com/tips/lint-checks
1. 项目中有哪些资源文件引入了却没有在代码中使用的话,会给提示。既包括图片资源、layout文件,也有定义的String常量和Color常量须的System.out和printstackTrace)
2. layout文件中编写不规范的地方,会给出提示。例如考虑到国际化,如果直接在xml中写汉字会提醒你把文字写到string配置文件中
3. 如果把定义图片大小的变量设置为px时,会提示你不太规范,改成dp
4. 布局属性使用不当、id重复定义、标签使用不规范等,都会提示你修改
5. 考虑到屏幕适配,如果有些图片只在高分辨率中放置了,会提醒你应该在中低分辨率的文件夹下也应该放置一份。

findbugs
Bad practice 坏的实践:常见代码错误,序列化错误,用于静态代码检查时进行缺陷模式匹配
Correctness 可能导致错误的代码,如空指针引用等
国际化相关问题:如错误的字符串转换
可能受到的恶意攻击,如访问权限修饰符的定义等
多线程的正确性:如多线程编程时常见的同步,线程调度问题。
运行时性能问题:如由变量定义,方法调用导致的代码低效问题。

PMD
     1.可能的bug - 空try/catch/finally/switch语句
     2.无效代码 -未使用的变量,参数和私有方法
     3.非最佳的代码 - 较耗费资源的String/StringBuffer用法
     4.过于复杂的表达式 - 不必要的if语句,或应该为while的for循环
     5.重复代码 - 复制/粘贴代码意味着复制/粘贴bugsurefire

checkstyle
(1). Javadoc注释
(2). 命名约定
(3). 标题
(4). Import语句
(5). 体积大小
(6). 空白
(7). 修饰符
(8). 块
(9). 代码问题
(10). 类设计
(11). 混合检查(包活一些有用的比如非必须的System.out和printstackTrace)

【配置】

1. 到更新中心安装Android插件,重启服务
2. 将当前默认的规则加上Android Lint(即在当前规则的配置继承选择它)


【参考资料】
《常用 Java 静态代码分析工具的分析与比较》http://www.oschina.net/question/129540_23043


落款2014.03.07

搭建Sonar平台(MySQL + Tomcat6)

1. Install server

wget http://dist.sonar.codehaus.org/sonar-2.14.zip
unzip sonar-2.14.zip

2. Create database

如果要迁移到Mysql上,需首先创建一个sonar/sonar的UTF-8的mysql数据库,并授权访问sonar库
mysql> CREATE DATABASE sonar CHARACTER SET utf8 COLLATE utf8_general_ci;
mysql> grant all privileges on sonar.* to 'sonar'@'localhost' identified by 'sonar';
mysql> flush privileges;

3. Configure database

修改conf/sonar.properties中的数据库配置

禁用默认数据库derby
#sonar.jdbc.url: jdbc:derby://localhost:1527/sonar;create=true
#sonar.jdbc.driver: org.apache.derby.jdbc.ClientDriver
#sonar.jdbc.defaultTransactionIsolation: 1
#sonar.jdbc.validationQuery: values(1)
启用mysql数据库
sonar.jdbc.url: jdbc:mysql://localhost:3306/sonar?useUnicode=true&characterEncoding=utf8
sonar.jdbc.driver: com.mysql.jdbc.Driver
sonar.jdbc.validationQuery: select 1
sonar.jdbc.user: sonar
sonar.jdbc.password: sonar

4.tomcat部署

1. 部署到Tomcat   执行war目录里的build-war脚本生成war文件,将war文件部署到应用服务器中
  注意:Sonar对内存要求比较高,一般的默认配置满足不了需求,所以需要定制一下Tomcat里的相应参数:
-Xmx512m -Xmx1024m -Dorg.apache.jasper.runtime.BodyContentImpl.LIMIT_BUFFER=true -XX:MaxPermSize=256m

2. 启动服务器后,访问http://localhost/sonar 就能看到界面了,default login/password is admin/admin.
额外说明:
如果想用自带的服务器 启动,即选择bin目录下相应的系统脚本就可以启动了,然后访问http://localhost
注意,如果采用此方式,则修改conf/sonar.properties时,也要配置自己对应的ip及端口号。
Create the file /etc/init.d/sonar with this content :
#! /bin/sh
/usr/bin/sonar $*
Register Sonar at boot time :

sudo ln -s $SONAR_HOME/bin/linux-x86-32/sonar.sh /usr/bin/sonar
sudo chmod 755 /etc/init.d/sonar
sudo update-rc.d sonar defaults

4.FAQ

【问题】Failed to execute goal org.codehaus.mojo:sonar-maven-plugin:2.0:sonar (default-cli) on project update-server-core: Can not execute Sonar: PicoLifecycleException: method 'public void org.sonar.batch.ProjectTree.start() throws java.io.IOException', instance 'org.sonar.batch.ProjectTree@1747f59, javax.persistence.NonUniqueResultException: Expected single result, but got : [Snapshot[resourceId=1260,buildDate=2012-04-27 18:52:19.0,createdAt=2012-04-27
【解决】更新mysql:
use sonar;
update snapshots old_snap, snapshots new_snap set old_snap.islast=0 where old_snap.islast=1 and new_snap.created_at > old_snap.created_at and new_snap.project_id = old_snap.project_id and new_snap.islast=1;
据说是个BUG,详情参阅http://jira.codehaus.org/browse/SONAR-2329

【问题】如何修改管理密码?I lost the admin password
【解决】
In case you lost the admin password of your Sonar instance, you can reset it by running the following update statement :

update users set crypted_password = '88c991e39bb88b94178123a849606905ebf440f5', salt='6522f3c5007ae910ad690bb1bdbf264a34884c6d' where login = 'admin'
This will reset the password to admin.
参考资料:http://docs.codehaus.org/display/SONAR/Authentication

落款2014.03.07

Jenkins SSH 调查

man bash,看“Invocation”,关于交互式shell与非交互式shell的差别。还有登录shell与非登录shell的差别。

man ssh, 看到“If command is specified, it is executed on the remote host instead of a login shell.”

interactive login shell, or as a non-interactive shell with the --login option
     /etc/profile首先加载
     接着
     ~/.bash_profile, ~/.bash_login, and ~/.profile
     注意:是按顺序尝试,只加载遇到的第一个

When an interactive shell that is not a login shell is started
     /etc/bash.bashrc首先加载
     接着
     ~/.bashrc

/etc/bash.bashrc:
# System-wide .bashrc file for interactive bash(1) shells.

# To enable the settings / commands in this file for login shells as well,
# this file has to be sourced in /etc/profile.

/etc/profile:
# /etc/profile: system-wide .profile file for the Bourne shell (sh(1))
# and Bourne compatible shells (bash(1), ksh(1), ash(1), …).


实际上,为了避免代码重复,通常
.profile会source .bashrc
/etc/profile会source /etc/bash.bashrc


Login profile files

When the SSH slaves plugin connects to a slave, it does not run an interactive shell. Instead it does the equivalent of your running "ssh slavehost command..." a few times, eventually to run "ssh slavehost java -jar …".
Jenkins SSH Slave的登录:只会调用/etc/bash.bashrc和.bashrc,并且是non-interactive的。在原始的.bashrc的第一 句话,就return了。

http://www.joshstaiger.org/archives/2005/07/bash_profile_vs.html
Mac OS X 是例外:
An exception to the terminal window guidelines is Mac OS X’s Terminal.app, which runs a login shell by default for each new terminal window, calling .bash_profile instead of .bashrc. Other GUI terminal emulators may do the same, but most tend not to.

https://help.ubuntu.com/community/EnvironmentVariables

Note: Variable expansion does not work in /etc/environment.

这一句很重要,在/etc/environment里写 CLASSPATH=$CLASSPATH:xxxx:xxxxx,会导致Jenkins解析环境变量时死循环,就在于变量不展开。 

落款2014.02.26

Monday, February 13, 2017

每日英语


I love it when I catch you looking at me then you smile and look away.
我喜欢这样的时刻:我抓到你正在看我,你笑了,害羞地别过脸去。 


I

CYGWIN搭建SSH服务

第一步:安装cygwin
第二步:运行D:\install\cygwin>Cygwin.bat
Copying skeleton files.
These files are for the users to personalise their cygwin experience.
They will never be overwritten nor automatically updated.
`./.bashrc' -> `/home/admin//.bashrc'
`./.bash_profile' -> `/home/admin//.bash_profile'
`./.inputrc' -> `/home/admin//.inputrc'
`./.profile' -> `/home/admin//.profile'
第三步:配置# ssh-host-config

第四步:启动SSHD服务
打开 控制面板-》管理-》服务 启动名为 CYGWIN sshd 的服务,亦可在cygwin中输入 cygrunsrv --start sshd 启动sshd, 输入cygrunsrv --stop sshd停止sshd
或者net start sshd /net stop sshd
第五步:验证SSHD服务

启动服务之后,通过从 bash 提示符输入以下信息测试服务:ssh localhost -l your_username
如果通知您不能建立本地主机的可靠性,并询问您是否确定要继续连接?,请输入 yes
当提示您本地主机上的帐户密码时,请输入您在登录计算机时使用的密码。
FAQ:
【问题】
Warning: They must match the regexp d..x..x..[xt
*** ERROR: Problem with /var directory. Exiting.
【解决】
builder@WIN-I5LS0DIFU1O /cygdrive/e/workdir/cygwin
# stat -c %A /var
drwx------
chmod 111 /var
【问题】cygrunsrv: Error starting a service: QueryServiceStatus:  Win32 error 1062:
【解决】重新ssh-host-config
*** Query: Should privilege separation be used? (yes/no) yes
将这一步的配置改为YES,然后创建SSHD服务。
【问题】Permission denied ,please try again.
【解决】
参考资料


Apache+ldap配置

用途:设置目录权限,使用ladp账号访问


Options Indexes FollowSymLinks MultiViews
AllowOverride None
AuthType Basic
AuthName "Please input your account/password of hiido udb (without dw_ prefix)"
AuthBasicProvider ldap
AuthzLDAPAuthoritative on
AuthLDAPURL ldap://121.14.36.18:389/dc=dw,dc=com?cn?sub
AuthLDAPBindDN "cn=admin,dc=dw,dc=com"
AuthLDAPBindPassword 1q2w3e@163.com
require ldap-user zhangsan lisi 


Options Indexes FollowSymLinks MultiViews
AllowOverride None

AuthType Basic
AuthName "Please input your account/password of hiido udb (without dw_ prefix)"
AuthBasicProvider ldap
AuthzLDAPAuthoritative on
AuthLDAPURL ldap://121.14.36.18:389/dc=dw,dc=com?cn?sub
AuthLDAPBindDN "cn=admin,dc=dw,dc=com"
AuthLDAPBindPassword 1q2w3e@163.com
require ldap-user zhangsan lisi wangwu laoliu


落款2014.02.11